
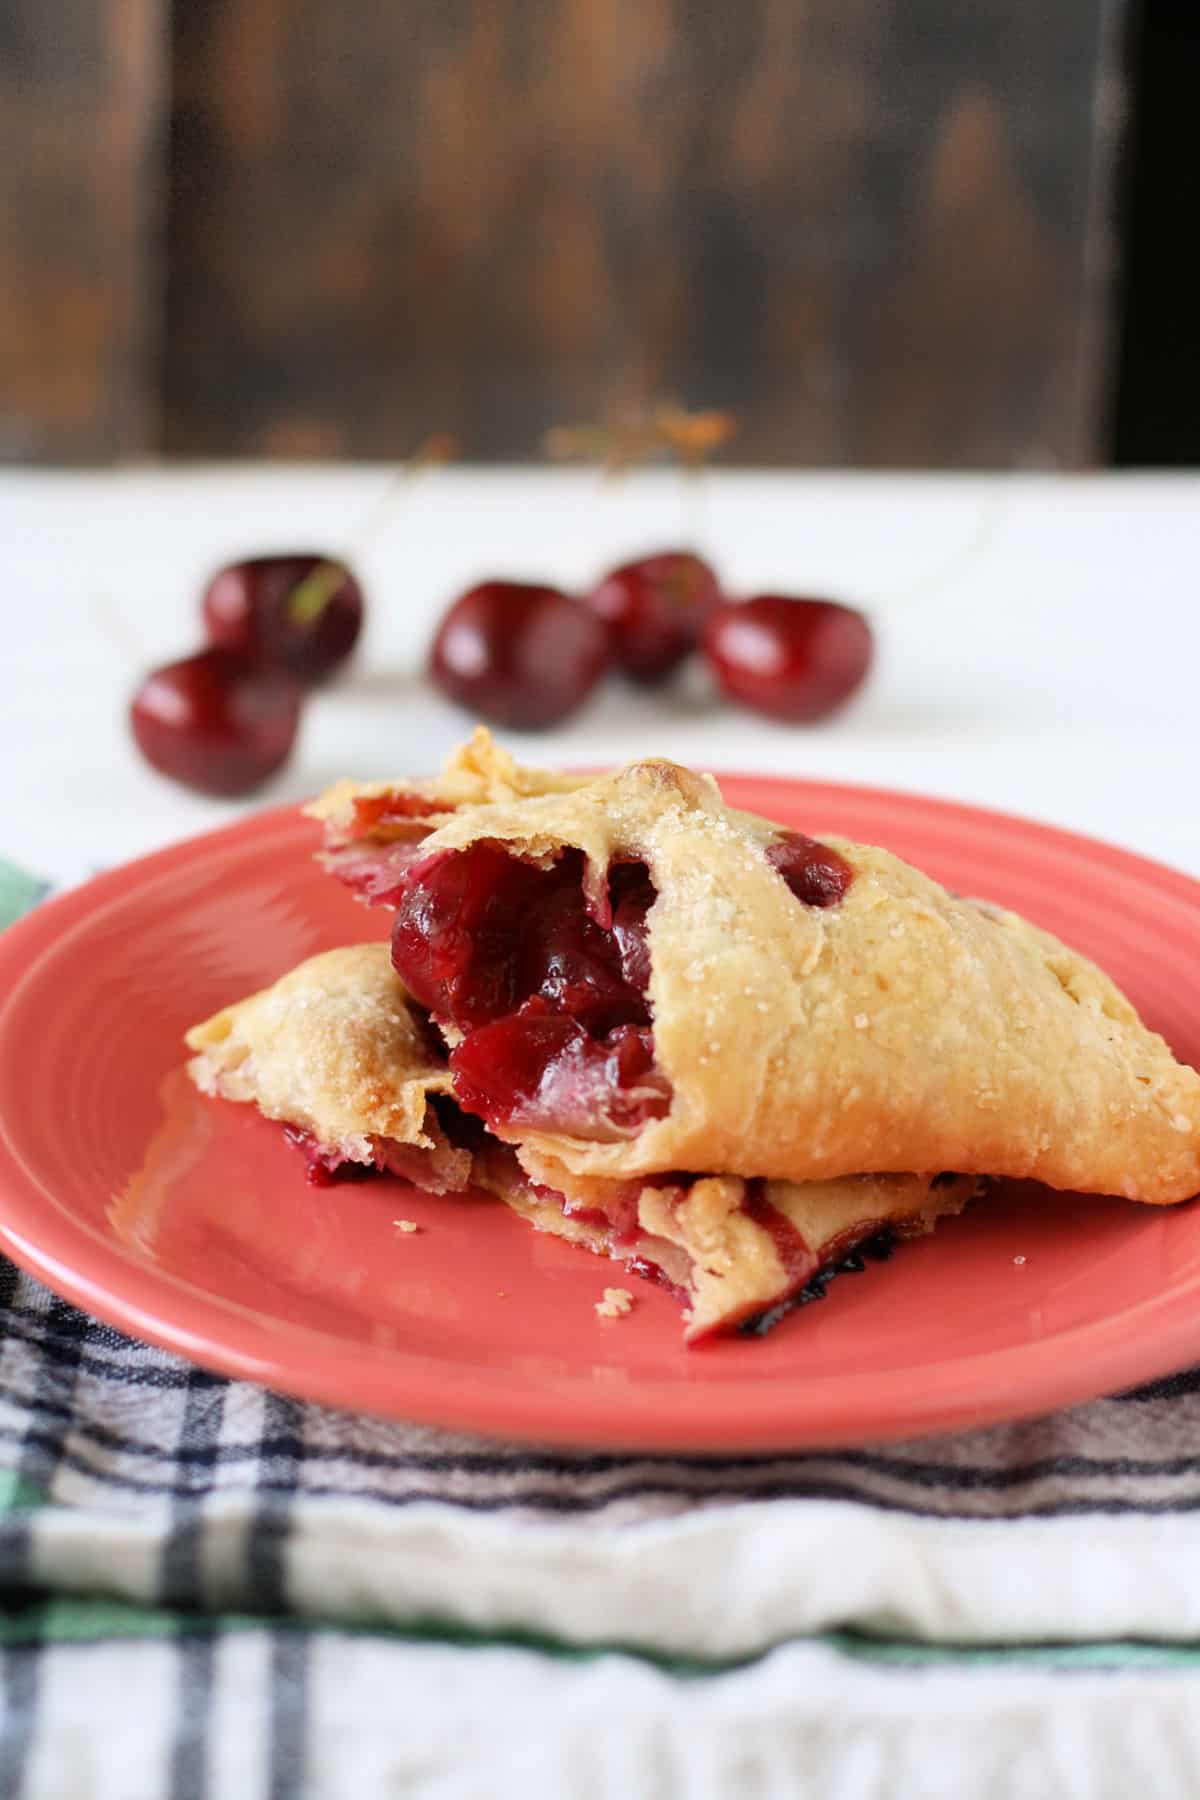
These vegan cherry hand pies are irresistible! Buttery, flaky crust, and sweet cherries make a wonderful summer dessert.
Summer is here, and cherries are in season! That means it’s time to make all the cherry desserts.
Are you a fan of cherries? I love to eat them plain, or in a Michigan salad, or on top of my overnight oatmeal.
And I especially love cherries in these flaky, delicious vegan cherry hand pies. If you love pie, you may want to check out my blueberry hand pies – those are also delicious and summery.
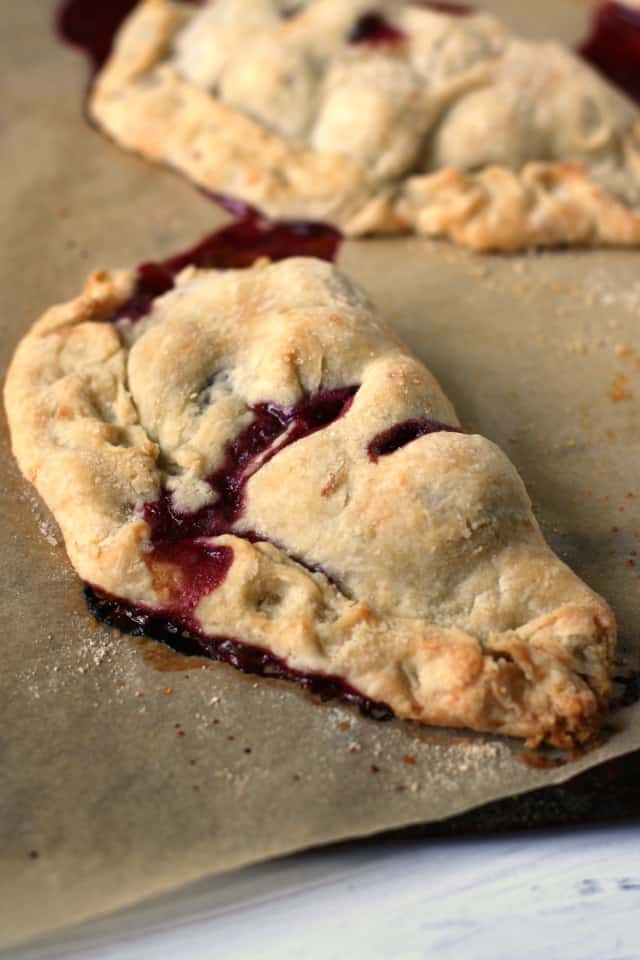
One thing that I love about these little pies is that the crust is very forgiving. I tend to have a hard time making a pretty pie crust, but no worries with this recipe! These are supposed to be rustic.
If you’re headed to a picnic, this is a great dessert to make because these pies are made to be portable. Just pack them loosely in a covered container and you’re good to go!
Jump to:

Ingredient Notes
- Flour – I made these with white spelt flour. You can also use all-purpose flour. Spelt is not gluten free, and should NOT be consumed by those who have Celiac Disease. Read more about spelt here.
- Vegan Buttery Spread – I have always used Earth Balance Soy Free Vegan Buttery Spread or Baking Sticks. Both work really well, and result in a light, flaky crust with a great flavor.
- Cherries – I usually use fresh sweet Bing cherries, but you could use sweet Rainier cherries as well. If you choose to use sour cherries, you would just need to add more sugar to your filling.
Special Equipment
I have a good cherry pitter, and I just use that tool and pit the cherries over the bowl. If you don’t have a cherry pitter, there are ways to pit them without it! This article has some good ideas.
How to Freeze Cherries
If you want to preserve a taste of summer, you can freeze fresh cherries. Wash and pit them first, then lay them flat on a cookie sheet and freeze for three hours. Place them in a freezer bag and store in your freezer for up to three months. Read more about freezing cherries here.
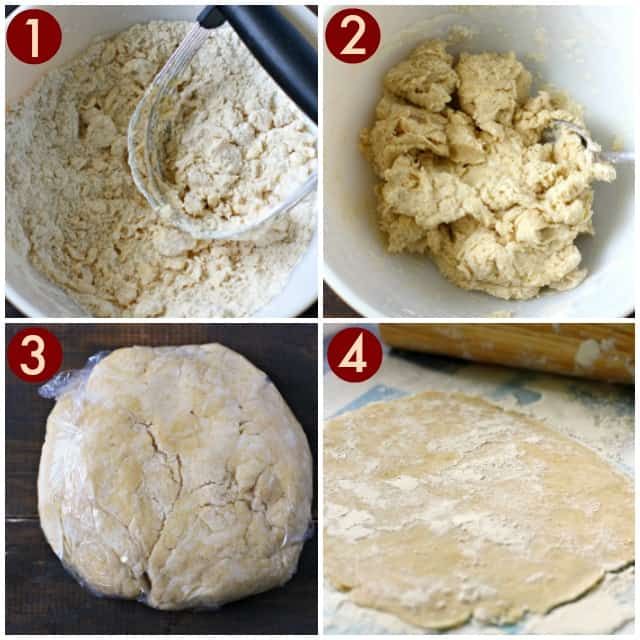
How to Make Vegan Pie Crust
- Combine the flour, salt, sugar, and vegan buttery spread in a bowl. Use a pastry cutter or two forks to incorporate the butter into the flour.
- Add ice water and stir until the dough comes together into a ball.
- Wrap the dough in plastic wrap and chill for 30-60 minutes.
- Roll the dough out on a well floured surface to prevent sticking.
Gluten Free Variation
Use a light gluten free flour blend like my recipe for gluten free flour mix if you need to make these without gluten.
Storage
You can store fruit pies covered, at room temperature for up to two days. After that, they can be stored in the refrigerator for two more days.


Disclosure: This post contains affiliate links.
Recipe

Irresistible Vegan Cherry Hand Pies.
Ingredients
For the crust:
- 1 ½ cups white spelt flour You can also use all-purpose flour or gluten free flour
- 2 teaspoons organic cane sugar
- ¼ teaspoon salt
- ½ cup vegan buttery spread cut into small pieces – I use Earth Balance
- 4-5 Tablespoons ice cold water
For the filling:
- 1 pint fresh sweet cherries
- 2 Tablespoons organic cane sugar
- 1 Tablespoon white spelt flour or all-purpose flour
For the topping:
- 2 teaspoons organic cane sugar
Instructions
Make the crust:
- Put the spelt flour, salt, and organic cane sugar in a large bowl. Add the vegan buttery spread (chopped into small pieces) and mix together using a pastry blender or two forks.
- Once the crust mixture resembles coarse crumbs, add the ice water and stir with a spoon until the dough comes together and forms a ball. Wrap the dough in plastic wrap or waxed paper and refrigerate for 30 minutes.
- Rinse and drain the cherries, then remove the stems and pits. I have a cherry pitter similar to this one. Put the pitted cherries, sugar, and flour in a bowl, and toss together.
- Preheat the oven to 400 degrees F. Line a rimmed baking sheet with parchment paper.
- Roll out some waxed paper on a clean surface, and sprinkle flour all over the paper. Coat the rolling pin with flour as well.
- Divide the chilled dough into four pieces. Take one piece and roll it into a ball, then dust it with flour.
- Roll the piece of dough into a circle that is about 8 inches in diameter. Place about a quarter of the cherries on the dough circle, and fold half of the dough over the top of the berries, leaving a ½ inch border peeking out from the bottom. Fold this border up and over the top piece of dough and use your fingers to crimp the edges.
- Use a knife to make three vent holes in the pie and place the pie on the baking sheet. Sprinkle the top of the pie with sugar. Repeat with remaining dough and cherries.
- Bake at 400 degrees F for about 25-30 minutes, until crust is golden brown. Some juices will probably escape from the pie.
- Allow pies to cool before eating. Enjoy with your favorite dairy free ice cream.

Jill Kimm
I mixed figs with dried bing cherries for the filling and made the pies a little smaller. Great vegan recipe!
Kelly Roenicke
That sounds like a good combination!
Alicia Storms
Those look amazing, and what beautiful photos! I am slowly trying to incorporate more plant-based recipes into my life, I wouldn’t have thought to try coconut oil. I’m glad that you explained it couldn’t just be substituted for butter because that was what I thought you did. I love baking, last night I made a carrot cake from scratch and it is so good.
Carol Credit
Thanks for sharing. Looks good. I can’t wait to try with blueberries.
Katie
Delicious recipe!