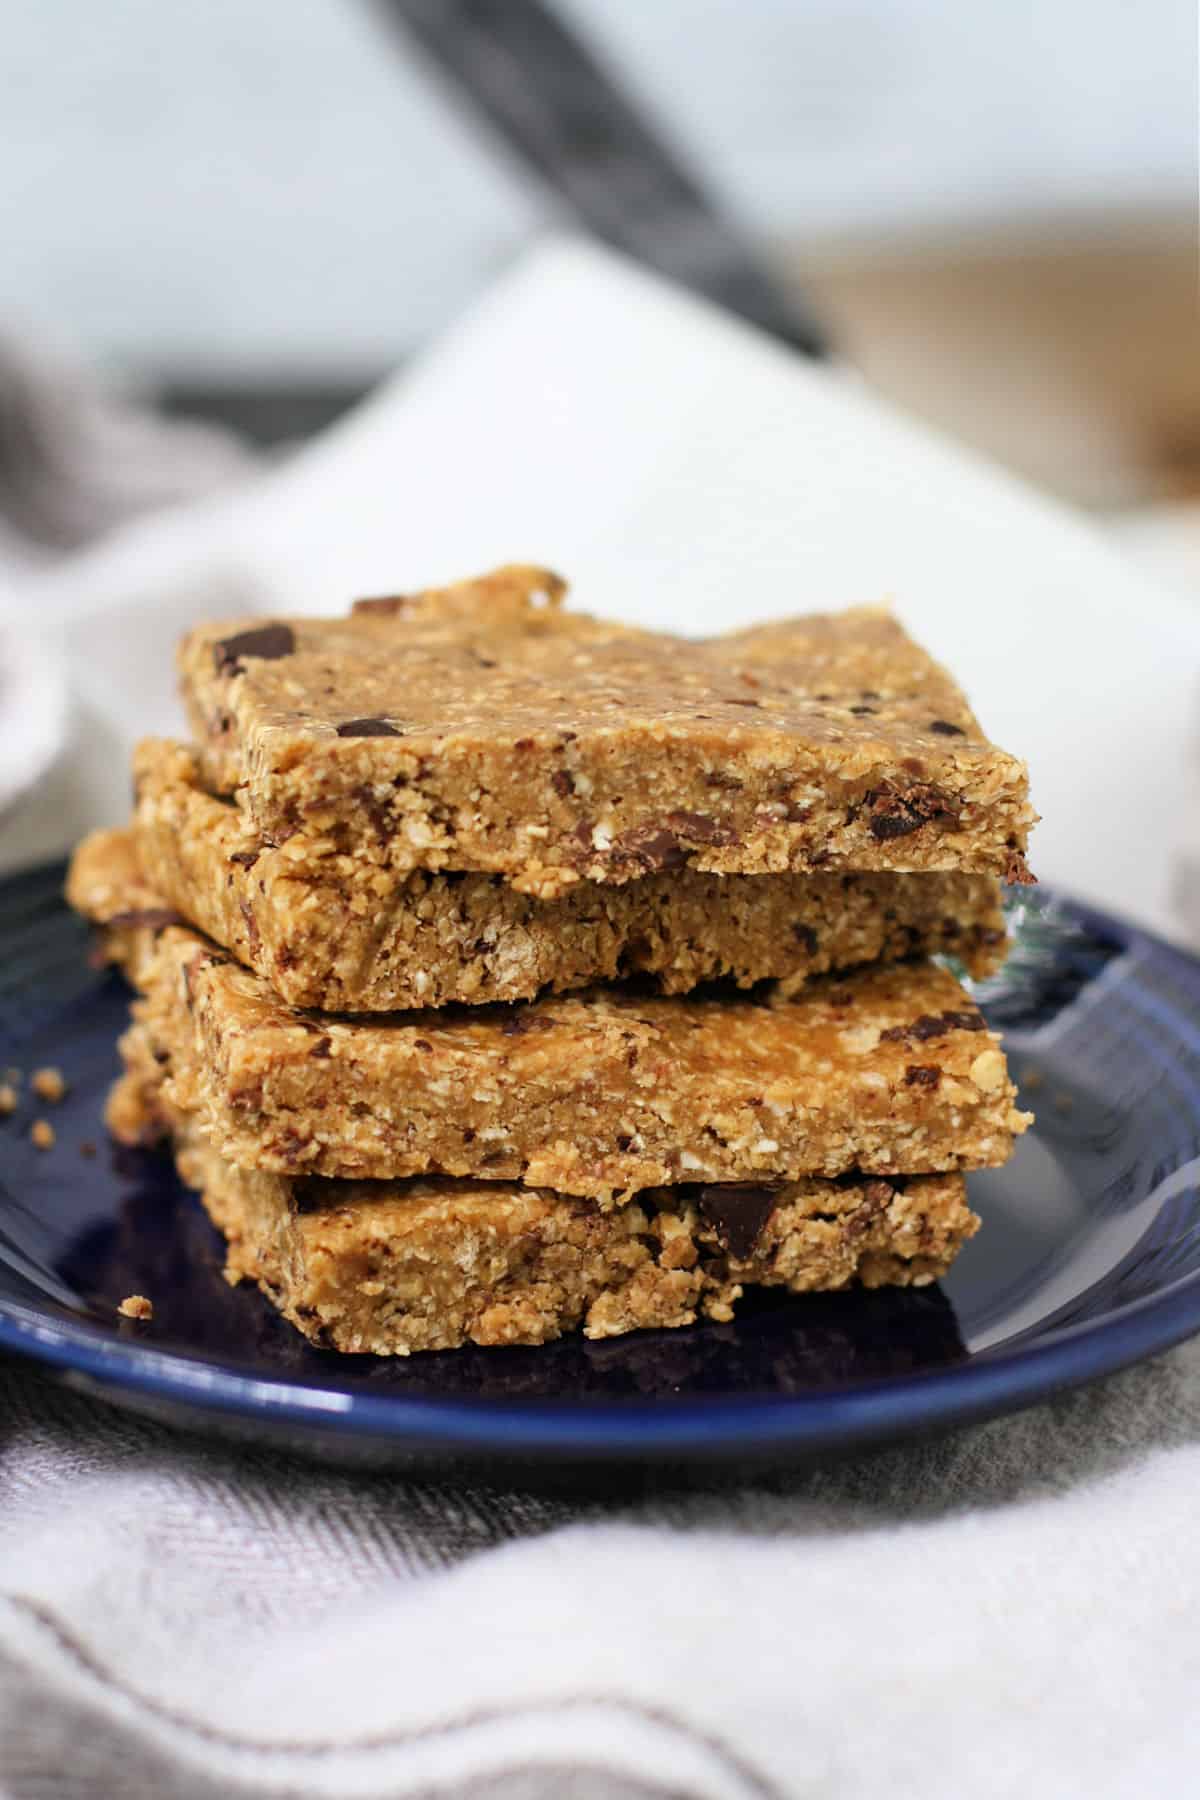
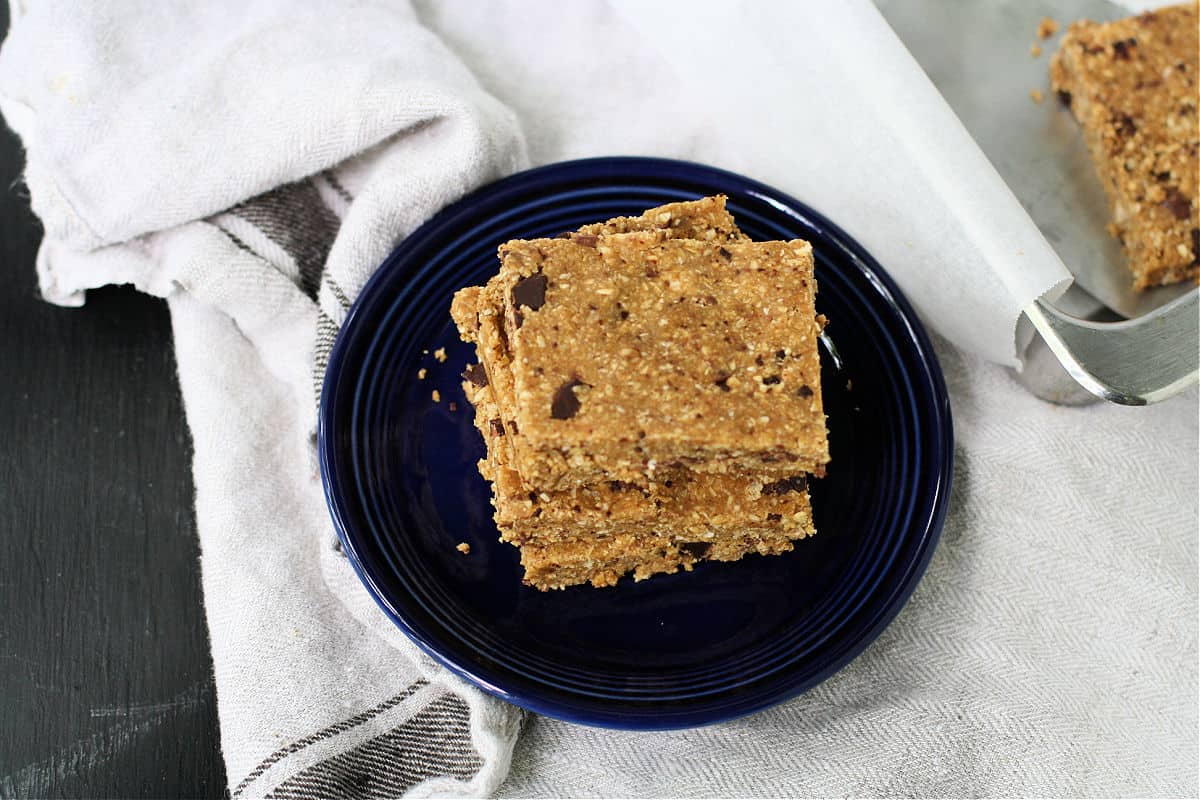
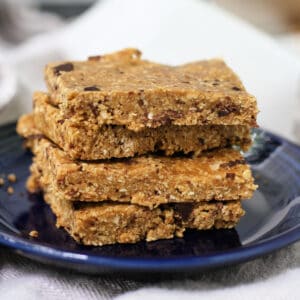
No bake granola bars are the perfect gluten free snack! These are delicious, chewy, easy to make, and economical! These chewy bars are full of flavor and made with simple ingredients.
Granola bars are such a great snack, aren’t they? They’re portable, delicious, and can be made allergy friendly pretty easily.
We love some of the brands of allergy friendly bars – Enjoy Life, Free Yum, and 88 Acres are some of our favorites. But they can get a little pricey! If you have kiddos that eat a lot of granola bars, you may want to try making your own top 8 free bars.
These bars are chewy, with delicious ingredients like oats, maple syrup, sunbutter, and chocolate shavings. I love these more than any store bought bar. And there’s room to customize this recipe to suit your family’s particular dietary needs.
Jump to:
Ingredient Notes
- Certified Gluten Free Oats – As I’ve mentioned before, we love GF Harvest Oats which are available on Amazon. They are made in an allergy friendly facility. You can also find other brands of certified gluten free oats at health food stores or online.
- Cereal – I used Cheerios, but you could use any oat or rice cereal that you are comfortable with. Rice Chex would work well.
- Sunbutter – I used Sunbutter brand natural sunbutter in this recipe, and it worked very well. If you have a different seed or nut butter that you can have, feel free to use it.
- Dairy Free Chocolate Shavings– If you want to be able to slice these granola bars neatly, you will want to get dairy free chocolate bars and use a knife to create chocolate shavings. Chocolate chips are too bumpy and make it hard to slice these bars neatly.
- Maple Syrup – I chose to sweeten these bars with maple syrup, but feel free to use honey if you are not vegan.
Step by Step Instructions
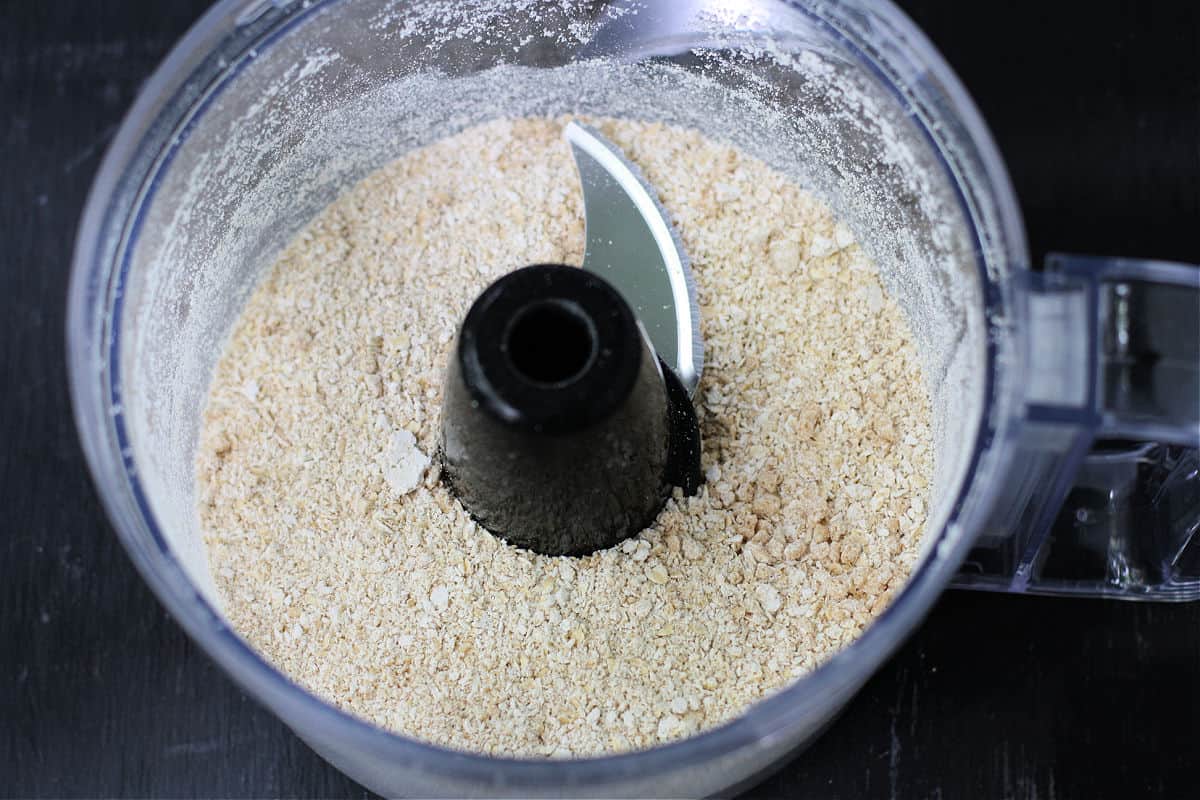
- Grind the oats in the food processor, then add the cereal. Ground oats, or homemade oat flour works well in this recipe. Whole oats make bars that are more difficult to slice, and more difficult to chew, especially for little kids.

- Pulse the mixture again until the cereal is also finely ground.
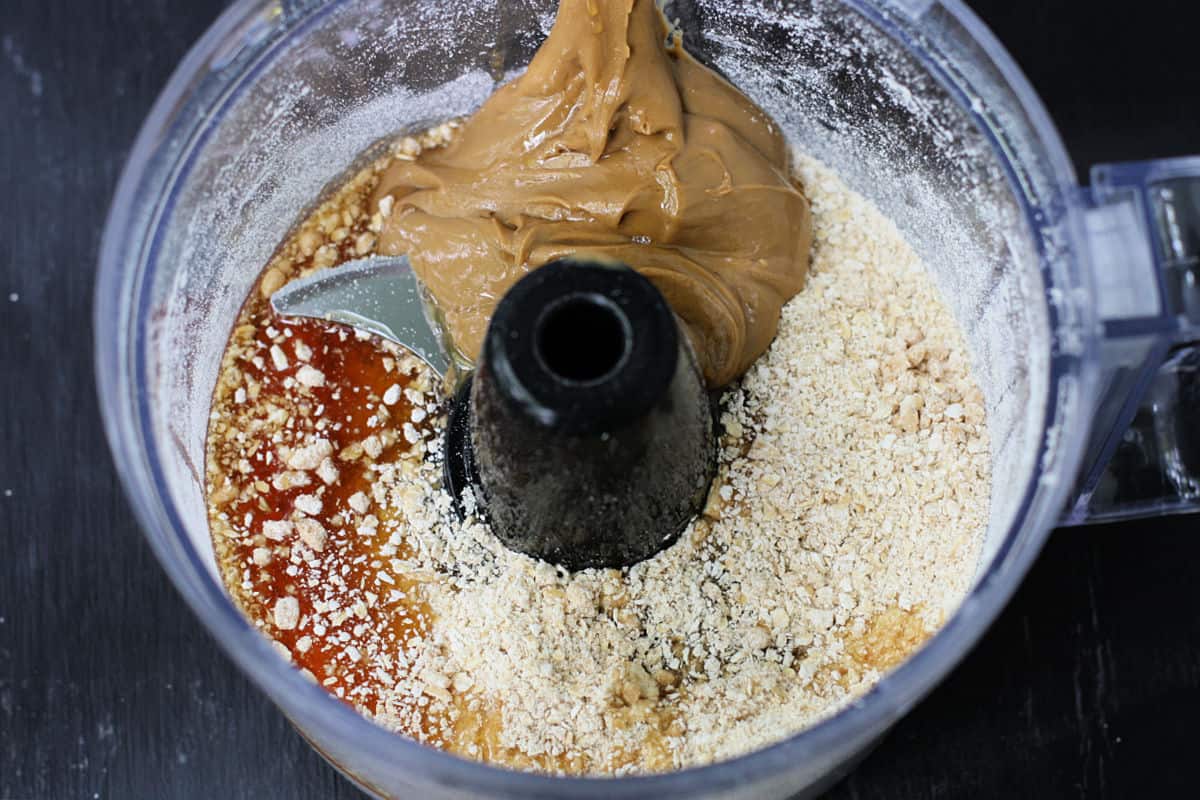
- Add the maple syrup and sunbutter and process until a thick dough forms.
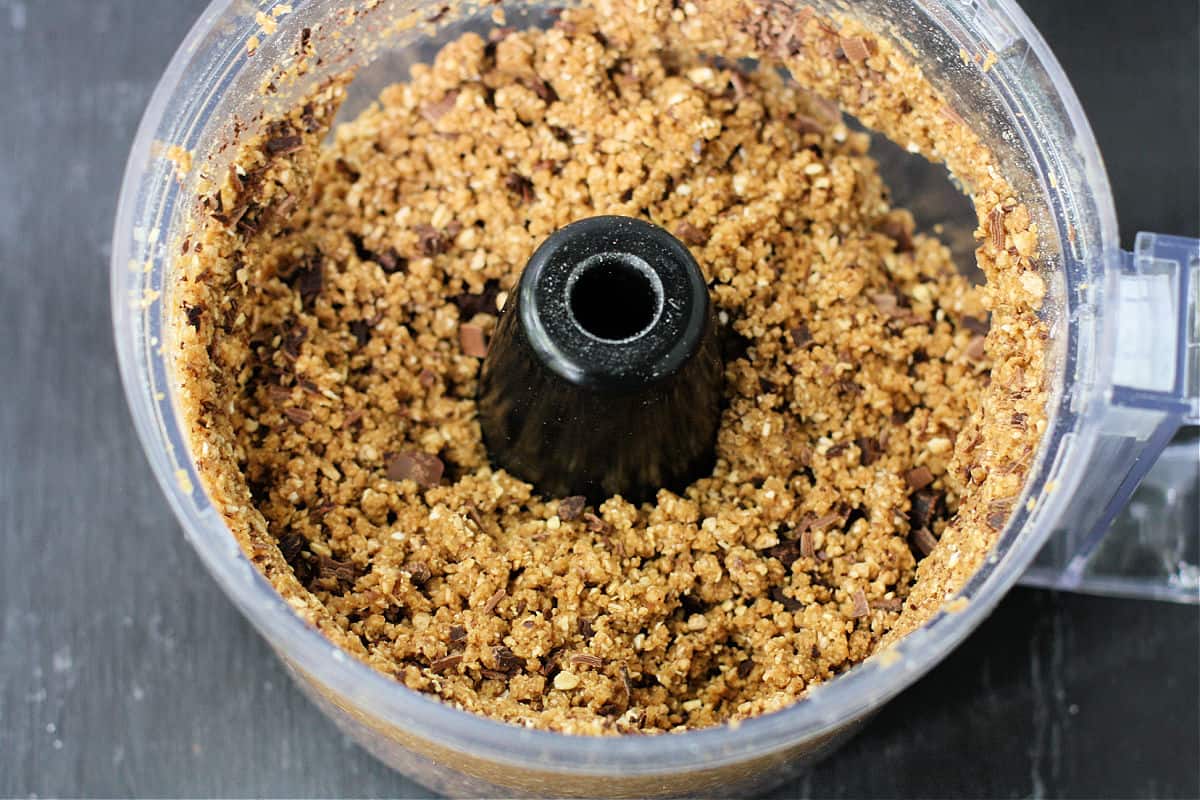
- Add the dairy free chocolate shavings and pulse again to combine.
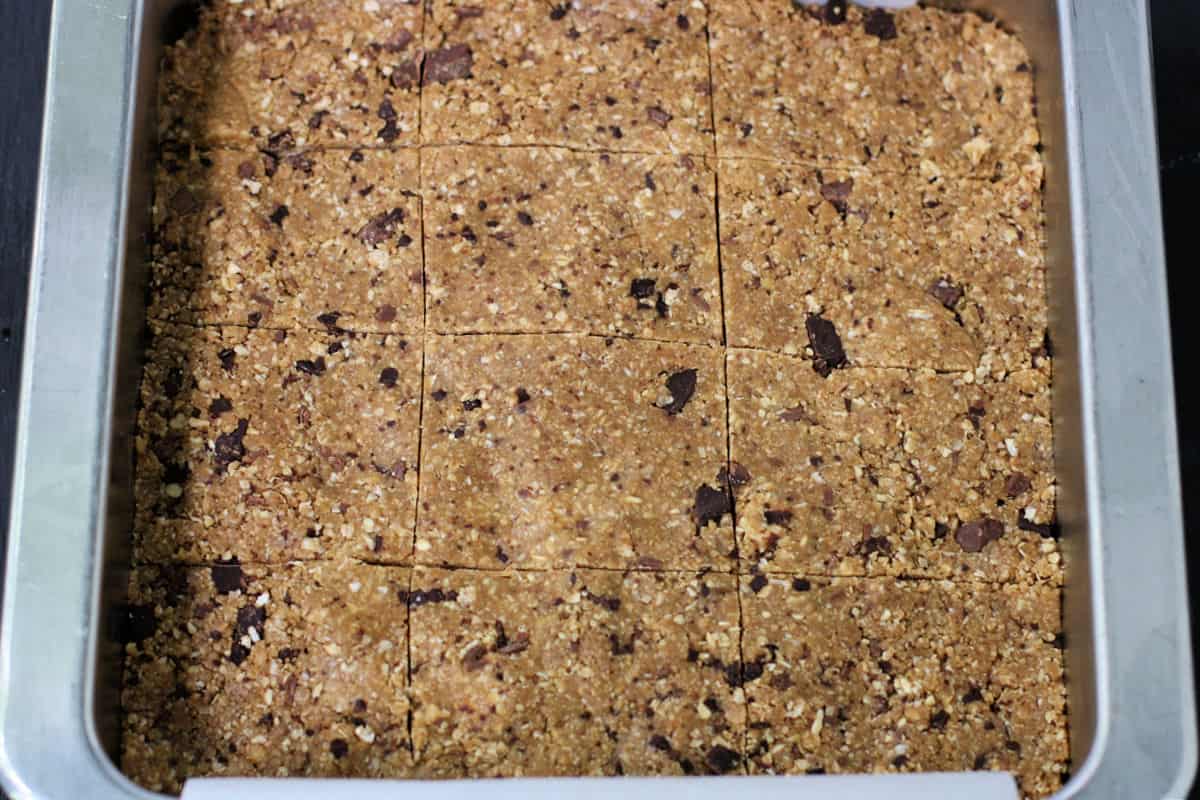
- Press the mixture into a square pan lined with parchment paper. Press down firmly to make sure the bars stick together.

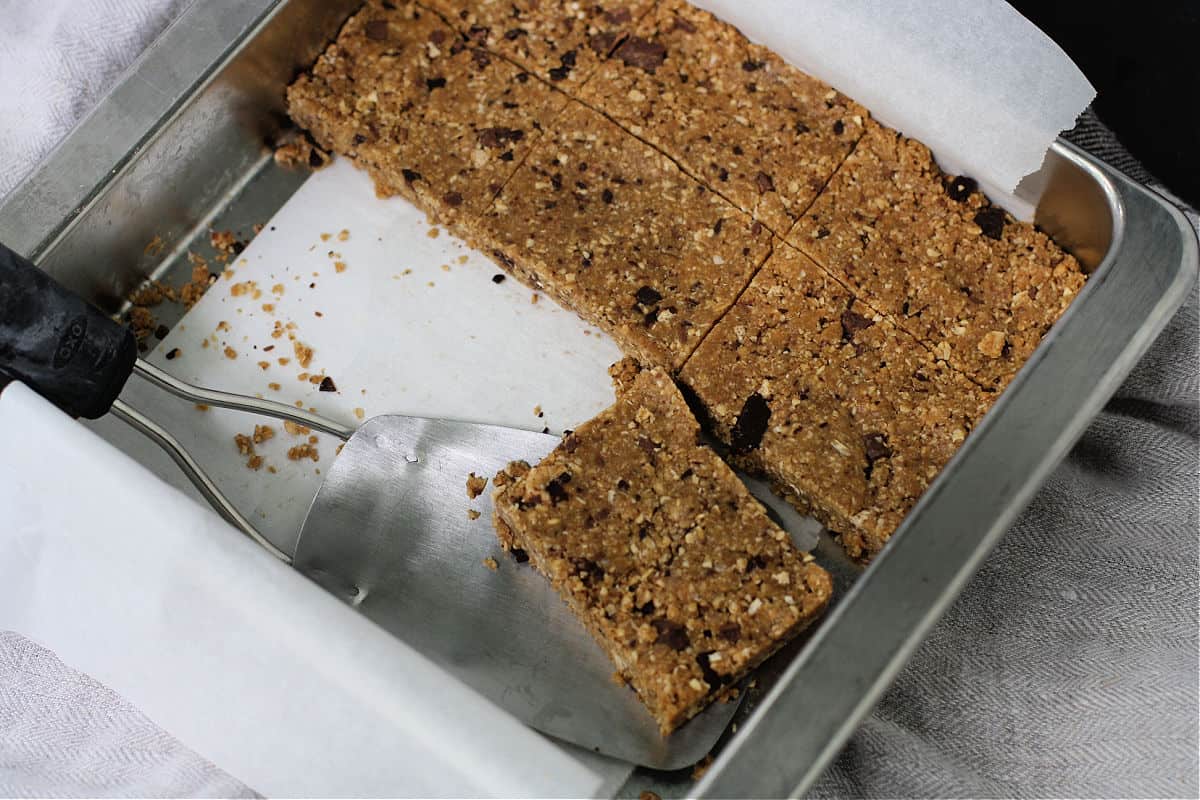
- Chill in the refrigerator for about an hour, then slice with a sharp knife.
- Use a thin, flexible spatula to remove bars from pan. You could also use the parchment to remove the block from the pan and then slice it outside of the pan.
Tips for Success
- Process the oats and cereal in a food processor. The finer texture makes these granola bars more enjoyable to eat.
- Take the time to make chocolate shavings. This will allow you to make very neatly sliced bars.
- Use parchment paper to line the pan – this will make it easier to slice the bars, and easier to clean up.
Learn to make SAFE, tasty food for your family. Join my community today and start getting all my best tips, tricks, and allergy friendly recipes in your inbox.
Storage
Store leftover bars in the refrigerator. They should stay fresh for about a week. You could also store these in the freezer – they should stay fresh in the freezer for up to 3 months.
More Gluten Free Snacks
Disclosure: This post contains affiliate links.
Recipe
No Bake Granola Bars (Gluten Free, Nut Free)
Ingredients
- 1 ½ cups certified gluten free old fashioned oats
- 1 ½ cups gluten free cheerios or a different cereal, like rice chex
- ½ cup maple syrup
- ½ cup creamy sunbutter or a different seed butter
- ½ cup dairy free chocolate shavings about one Enjoy Life chocolate bar
Instructions
- Line an 8×8 pan with parchment paper so that it hangs over two sides.
- Use a sharp knife to finely chop the chocolate bar. I usually just drag the knife on the edges of the bar so that little shavings of chocolate fall off. Set aside.
- Place the oats into a food processor and pulse until they are finely ground.
- Add the cereal, and pulse again to grind.
- Add the maple syrup and sunbutter, and process until a thick dough forms.
- Add the chocolate shavings and pulse to combine.
- Put the dough into the prepared pan. Use a piece of waxed paper to press the bars down firmly and evenly.
- Cover the pan and refrigerate for one hour.
- Use a very sharp knife to slice the bars. You can do this in the pan, or remove the slab of dough with the parchment, and then slice the bars outside of the pan.
- Enjoy!

P
Delicious! I ended up using the Enjoy life mini morsels but these granola bars were a hit!
Kelly Roenicke
Wonderful! Thank you for letting me know!
D
These are so good!